Today we’re picking up from last time when we discussed why any knowledge entrepreneur should create an email course. In summary, an email course is a short course that can be an integral part of your email marketing strategy.
It’s a great way to attract learners and build awareness for your online course business with quality content that doesn’t take a lot of time and commitment to make — but certainly pays off. It’s a tried and true method that online course creators use to generate buzz about their products and test their ideas before launching something bigger.
Now, even if it seems like you could just hop on your computer right now and start working on it, there are a few steps to keep in mind if you want to get the most out of your email course.
10 Practical steps on how to create an email course
Let’s not waste time and get right to it:
-
Set a goal
Building an email list can be a goal in itself, but you need to think about what you’re going to do with that list. You need to have an end goal.
Read more: 4 Easy ways to build an email list to promote your online course
This part is essential because you want to make that email list work for you after the short course is over. Do you want to attract learners to a full course? Do you want to test a course idea first? If you’re unsure right now, pause what you’re doing and figure it out.
If you have different random goals in mind, people will get confused and won’t answer your call-to-action (CTA). Based on what you want them to do next, you can direct them to a full course landing page, your website, your social media pages, etc. Even more, set specific goals such as increase my email list by 25%, so you’ll have something to compare against the final result.
-
Choose a topic
Remember that this is a short course, so don’t choose an overambitious topic. If you find this tricky, go through your blog, YouTube videos, ebooks, or other materials and make a list. Then, narrow it down to what seems to be the most useful topics that won’t take ages to explain. If many subjects are appealing to you, just choose what you’d like to do best.
Read more: How to choose a bestselling online course idea
If you already have a course idea in mind that you’d like to promote to subscribers, choose content based on some parts, but do not give away everything. After all, the goal is for learners to take the full course.
-
Choose your platform
There are many email marketing solutions available out there, so we won’t go through them all. My advice is to choose a tool that integrates with your learning platform.
For example, by linking your MailChimp and learning platform accounts, you can import and export contacts from one place to another. It’ll come in handy when you send subsequent offers to prospective learners.
Email marketing solutions have everything you need to create an email campaign, including the ability to automate the sending process, so I strongly recommend using one.
-
Create a landing page
Even if your email course won’t be published on your learning platform or main website, you have to have a landing page for it. If you use MailChimp, you can create landing pages and embed a form that people use to sign up for the course.
The landing page should have all the elements that help you convert visitors into learners, including a great headline, an outline of the short course, an instructor bio, and a CTA to invite users to sign up.
Read more: 7 Must-have elements on a converting landing page [INFOGRAPHIC]
A quick tip: keep the form short and to the point. You want people to sign up fast. The longer the form, the more odds that they’ll give up halfway.
-
Create the course outline
Just like any other course, an email course also needs an outline. In fact, it’s best to be as transparent as possible and include the outline on your landing page (see step 4) so people get to know what you have to offer. This outline is much simpler than what you’re used to if you’ve ever created a full course:
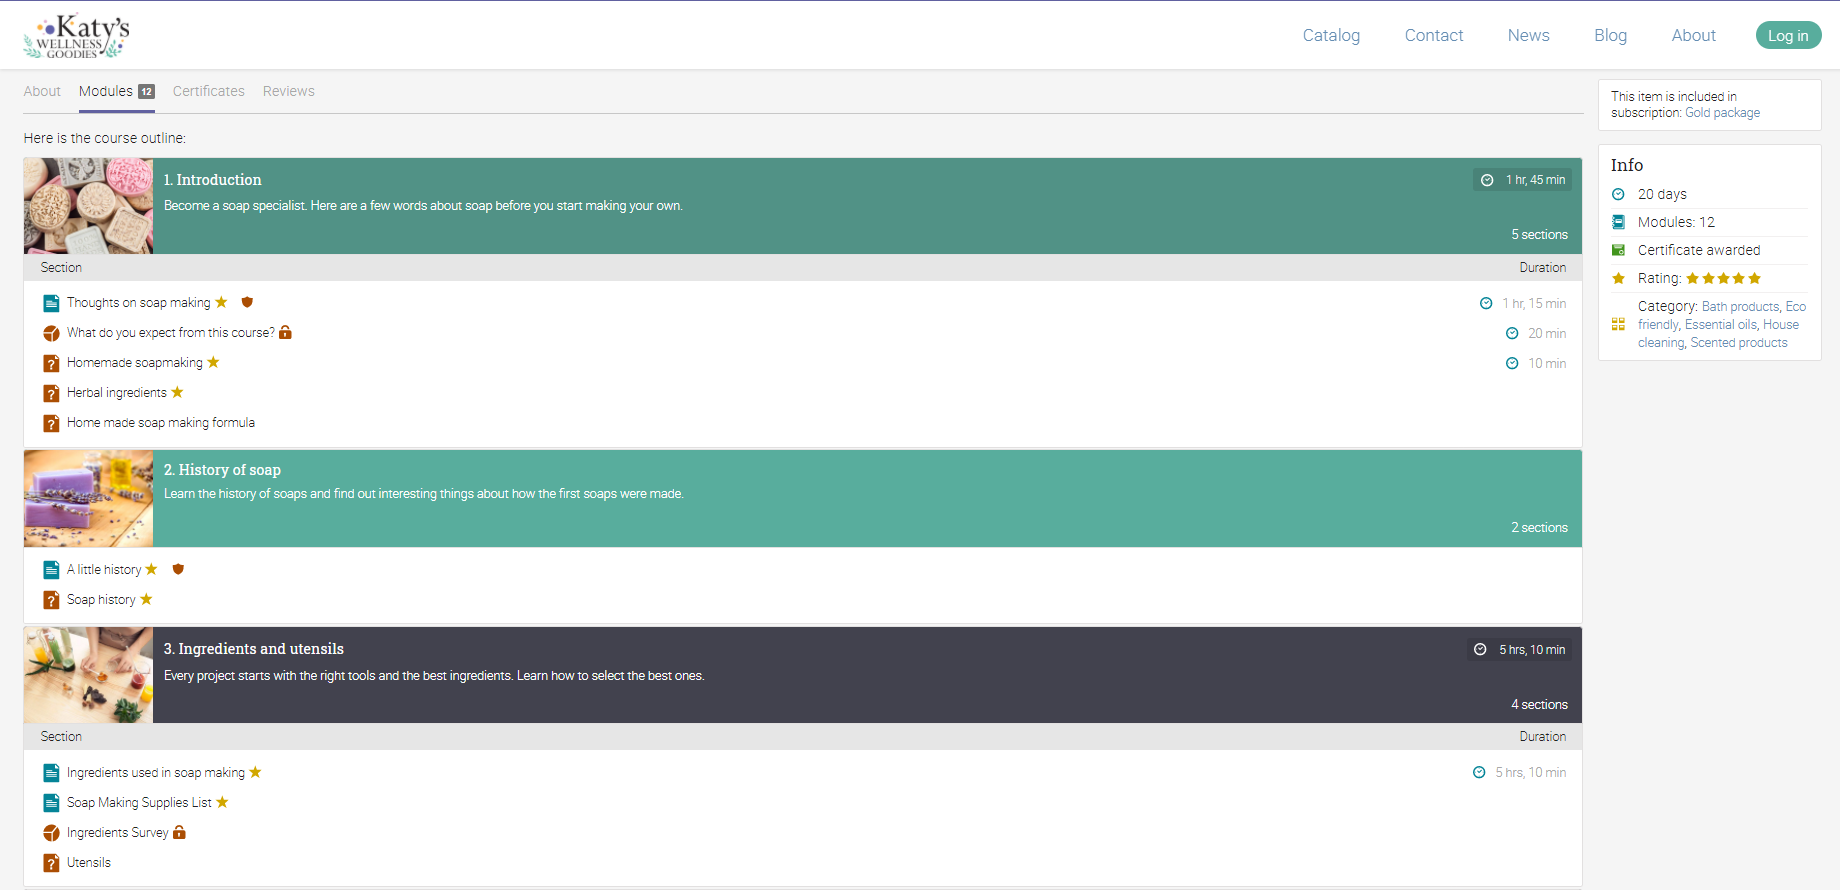
Also, don’t stress too much about subtitles as you don’t have to use the same ones for the email subjects. For example, if a subtitle is Safety measures, that’s pretty boring. My email subject line can be: Do this to stay safe while making soap. Read more about this in the next step:
-
Create the content
Approach content creation as if you were making a micro-course. Micro-courses give out information in small doses that take around five minutes to complete. Otherwise, you should treat each email as a regular course content page. Carefully choose the fonts, spaces, font size, don’t go crazy on colors, and always proofread before sending it.
Read more: 4 Ways to create meaningful microlearning in your online course
Other best practices are:
- Each email should take around five minutes to read
- Keep them to around 500-600 words
- Re-use content from your blog, podcasts, other courses
- Add a few images to help the reader remember key information
- Integrate video into your email using images
Just because people subscribed, it doesn’t mean that they’ll read the emails. To add a little extra motivation, you need to choose a great subject line. It can be the name of your email course and a subtitle. Here’s an example of a catchy line:Be your own boss course: Don’t quit your job before doing this
Read more: 6×4 Inspiring examples of email subject lines
-
Create an email campaign
To make your life easier, just create an email campaign using the email marketing solution. Most of them allow you to arrange emails in the right sequence and send them automatically.
Around five emails should be enough. If you have relevant content to include in each email, you can send out more, but at this point, it becomes more work for you. There is no golden rule for scheduling emails, but here are some ideas that might work:
- One email a week for five weeks
- Two emails a week for three weeks
- Three emails a week for two weeks
For the most part, do whatever’s most convenient for you. -
Include a CTA
Remember step 1, where I said that having an end goal is a must? If you want to direct people to a specific course, or maybe your course catalog, include a CTA at the end of each email.
Now, readers might find this annoying if the CTA is an image with red letters accompanied by seven exclamation points that scream at them to Buy courses now! (!!!!!!)
I’m exaggerating, of course, but the point is to make it as subtle as possible. A clickable image that encourages learners to find more about what you do should be enough. If you think that ending each email like this is too much, you might want to only include a CTA at the end of the course (final email). Alternatively, it’s nice to send a thank you email after they finish the whole thing to invite them to go back to your website.
-
Have a consistent schedule
Some people’s inboxes are flooded with emails — tens of thousands of them. The key to getting yours noticed is to send emails at a time that would be more convenient for learners.
Schedule emails to send automatically on specific days and try to stick with it. I use the email open rate as a basic metric, but you can check other results as well (see step 10). This takes a bit of guesswork and looking at data to figure out when the target audience is most likely to read what you’ve sent. If people are interested in self-development, they’re probably inclined to check their inboxes during the first half of the day. Sending them during the weekend might be a good idea as well.
Read more: Top 3 tips for increasing your email open rates
-
Measure results
If you had a goal to increase your email list by 40%, did you achieve it? It’s important to ask yourself these questions to measure the engagement of your prospective learners. If it’s okay, they’ll probably want to check out your products.
If you’re using the email course as a simulation for a full one, there’s no skipping this step. Your email marketing solution probably already has the email analytics you need to watch out for. To summarize this, list growth rate, email sharing rate, open rate, and overall ROI are a few key elements you can’t miss.
Plus, if you’ve gone through the first nine steps, you’ll probably have good results so don’t be afraid to analyze your email course performance.
Conclusion
After sending the email course, you’ll probably have a growing email list that you can use to promote other products to prospective learners. Don’t wait too long as you risk losing their attention.
As you’ve seen, creating an email course is relatively easy and can be done in just a few days or even over the weekend, but don’t forget to measure results at the end. An email course is an effective way to grow your email list and test your course ideas, so what are you waiting for?
